Followers

Thanks for the comments

Thanks for stopping by, if you have enjoyed what you have seen send me a little note, I love hearing from all of you.

Showing posts with label Design Studio. Show all posts

Friday, March 4, 2011

It is Mardi Gras Time (another cut file)

Mardi Gras is a big deal here in St. Louis. We have the second largest Mardi Gras celebration in the country. I have already had a piece of King Cake and I didn't get the baby and there are beads everywhere you look. With all the celebration preparations I have fleur de lis on the brain again, so I thought I would share another layout that I used the fleur de lis medallion, but there is a bonus! I also created a fleur de lis border to go with the medallion.

 This border in the pictures is actually the bottom layer there is a top layer that has more detail that I didn't cut for this layout. The paper lace under it is a Martha Stewart border punch. You can make a lace border if you cut it on both sides. A little tricky but it can be done.

Here is the fleur de lis medallion you can look back at the previous post for the cut file.

I have  been using this butterfly a lot lately. I just love it. This is from the Cake Cartridge.


Oh, I guess you want the cut file for the fleur de lis. Here It Is. The cartridge used is Home Decor.

Monday, February 28, 2011

Quilt Border (Cut file)

Here we are with another 12x12 layout. This time the cut file is from the Paper Lace Cartridge. 
  There are two parts to this cut file. First there is the quilt border then the layer behind it. The bonus is there is another cut for a card also. I have not cut the smaller card cut but you are welcome to cut it and let me know how it worked out for you.

You can see that it is very versatile. Of course I had to use some rhinestone (since I have so many). I am anxious to use border for the card, but right now everything has been put away.....till I get my scrap-room back.

To upload the file click Here.......and your welcome.

Tuesday, February 1, 2011

Valentine Cut File


It is snowing again. Let me clarify that it is sleeting with snow soon on the way. Today is my usual work day and to pass the time stuck at home I created a few new cut files.


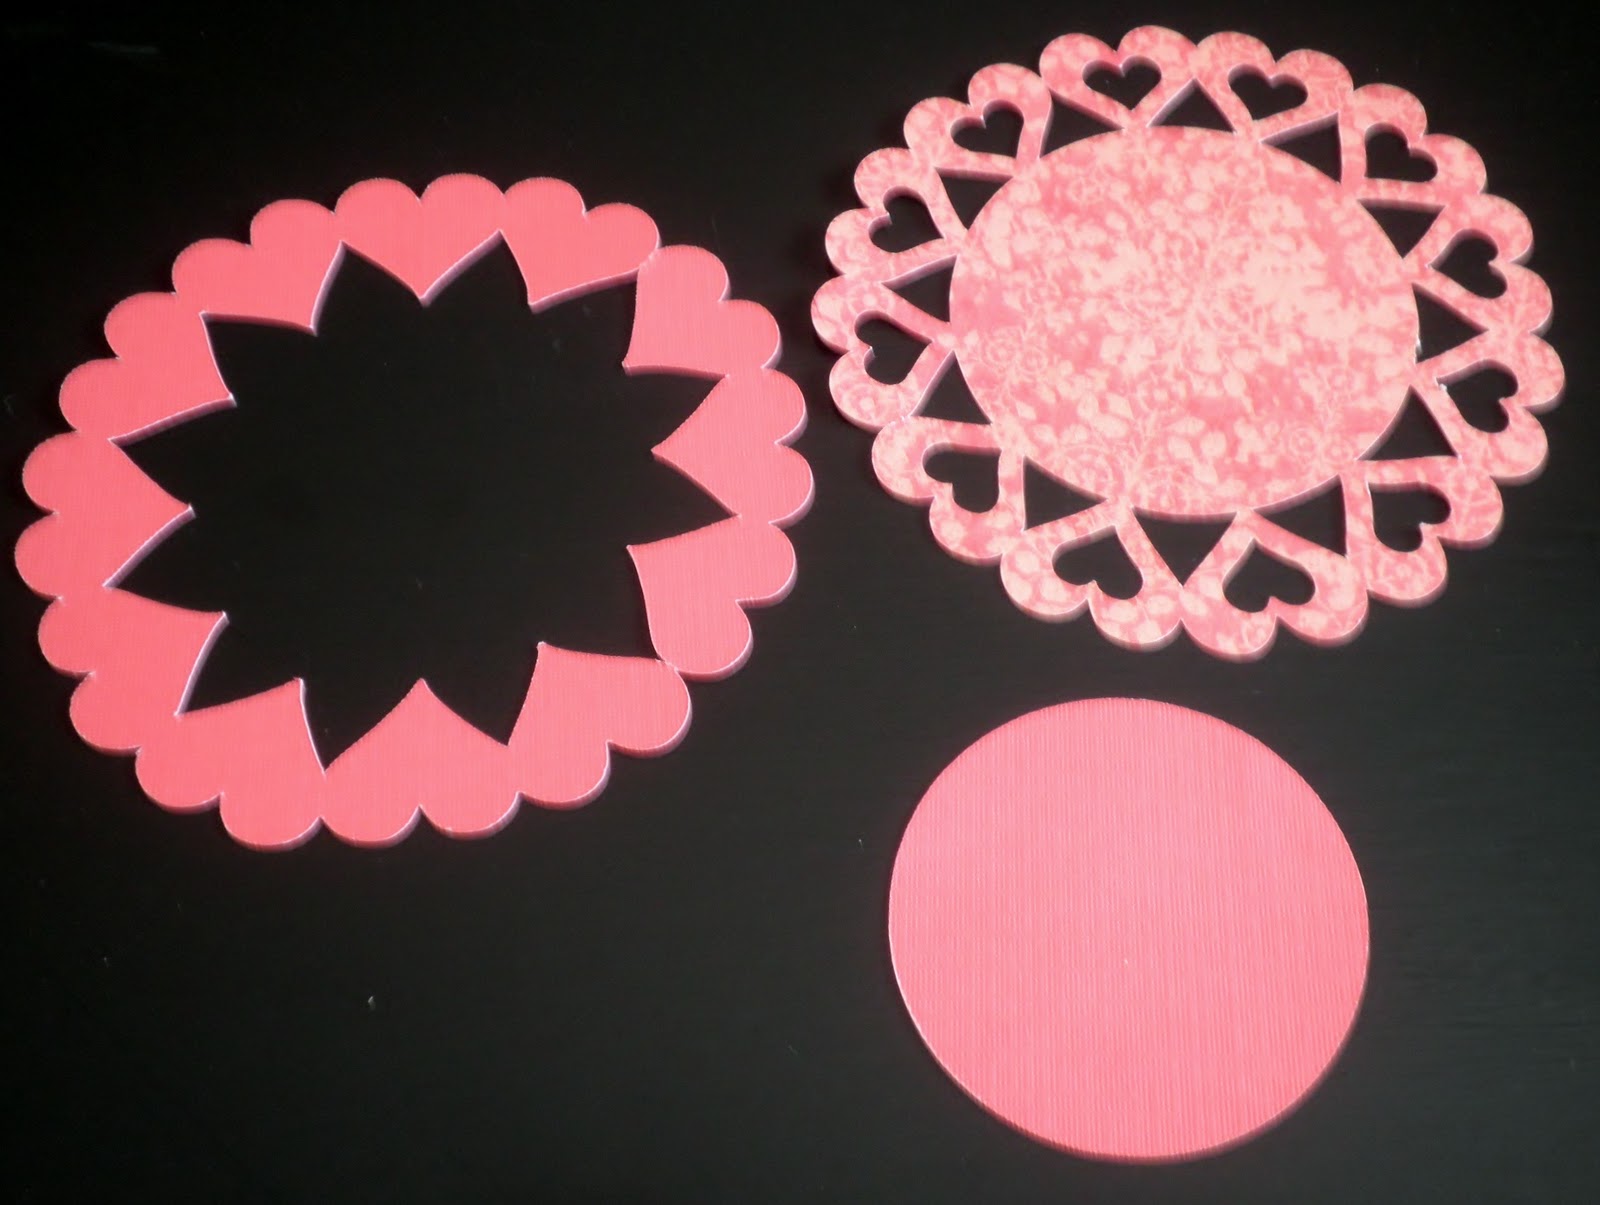
This heart medallion was inspired by a Spellbinders element I saw and like. There are 3 cuts that you need to create this. Plantin Schoolbook cartridge.
I cut this twice using 2 different kinds of paper so then you have two different elements you can use.

but wait....... the patterned paper was 2 sides so I could even change it up more.


The great thing about this cut is that it fits a card or you can use it for a scrapbook page too.
The excess from the original design are also great. The solid color one I embossed with a Sizzix embossing folder.


If you want the file click HERE and if you make something with it please be sure to share. **** If you download the file please be a doll and leave me a comment after all it is the polite thing to do. Right?******


Monday, January 17, 2011

Cosmo Cricket and the Cricut.......Card

Today was the day I needed to make a card  for my 3rd week of sending out a card every week.  I was looking at the Everyday Cricut website for some ideas for cards using my Cricut and came across a really cute one HERE. On my Black Friday shop-a-thon I purchased the Preserve cartridge at all places a Home Improvement store called Menards. They had Cricut cartridges there for $20.00. Needless to say I went crazy! What attracted me to the card was the paper. It was from Cosmo Cricket Garden Variety 
( FYI-If you click on the names it will take you to the links)  I love Cosmos Cricket paper but it is really hard to find in the stores around STL so with my hot little 40% off coupons I purchased this paper pack!

So to the card............................... These are the elements that you need. If you want specific direction I would want you go to Here (Card Directions) since Melanie is the one who originally designed it. I did make a cut file for it though. The file cuts 6 of the strawberry elements. The other paper I cut with my papercutter.
Here is my version of the card. I made the strawberry 4 1/5 inches instead of 3 1/5 like Melanie did. (Only because I thought it said 4 1/2 inches when I read the direction. Oops)
The saying I printed out on the computer it says if you can't read it "Bless You Berry Much"
Thanks Melanie for the inspiration

Here is the cut file STRAWBERRY CUT FILE

This .cut file is open to everyone enjoy!

Monday, October 4, 2010

BOO! Scary Mailbox

Okay I guess my new obsession is putting vinyl on my mailbox. I was looking at some blogs this weekend and saw some luminaries for Halloween and thought oooooh, I could do my mailbox. So I got up early this morning and decked it out for Halloween, (BTW it is freezing here in STL and about froze my fingers off doing this). I am not a huge Halloween fan and count the days till it passes but I couldn't pass up decorating my mailbox with the vinyl.

I hope this doesn't scare the mailman so much that he won't deliver the mail!


The other side. Scary isn't it. The great thing is I used almost all the cuts because you can use the inside of the eyes too. George and Basic Shapes was great for this I just welded a few circle and ovals together if you really need the file request it but try it yourself it is really easy.If I would of thought about it soon I could of ordered some glow-in-the-dark vinyl. Next year


SYS Thurs<

This is where I have linked my project to this week

Friday, September 10, 2010

Storybook Layout

I am finally back to scrapbooking (my first <3) I have been wanting to do some layouts on my Design Studio. The great thing about Design Studio and the Gypsy is you can design your layout then make individual pages for each cut and save the file for future use. Inspiration came from this months Page Maps (love that web site).
This was done in Design Studio, but you Gypsy user know how to change the .cut files. It is done using just Storybook. Click HERE to access the file.  I would love to see your pages if you use it. I plan on putting a picture of my youngest son and my mom that was taken Labor Day weekend. They had just finished  fishing and I got them to pose for a picture by the lake.
The paper I used was from K and Company-Portabello Road (I got it at JoAnn's on clearance for $7.97) I cannot resist scrapbooking paper and I really can't resist when it is on clearance.
I embossed the green medallion with the Cuttlebug Swiss dot Embossing Folder and then used some black ink on the raised dots. Then using a blending pad with the black ink again to go around the frame for my photo. Okay then, hope you have a little time to scrapbook this weekend, I will be hunting and gathering for my up coming Scrapbooking getaway week. Yes, you read right WEEK. It is coming up in October so I am on the hunt for lots new things to take with me. Yikes I am going to need a U-Haul!

Saturday, August 14, 2010

Decked Out Mailbox (for all to enjoy:including the mailman)

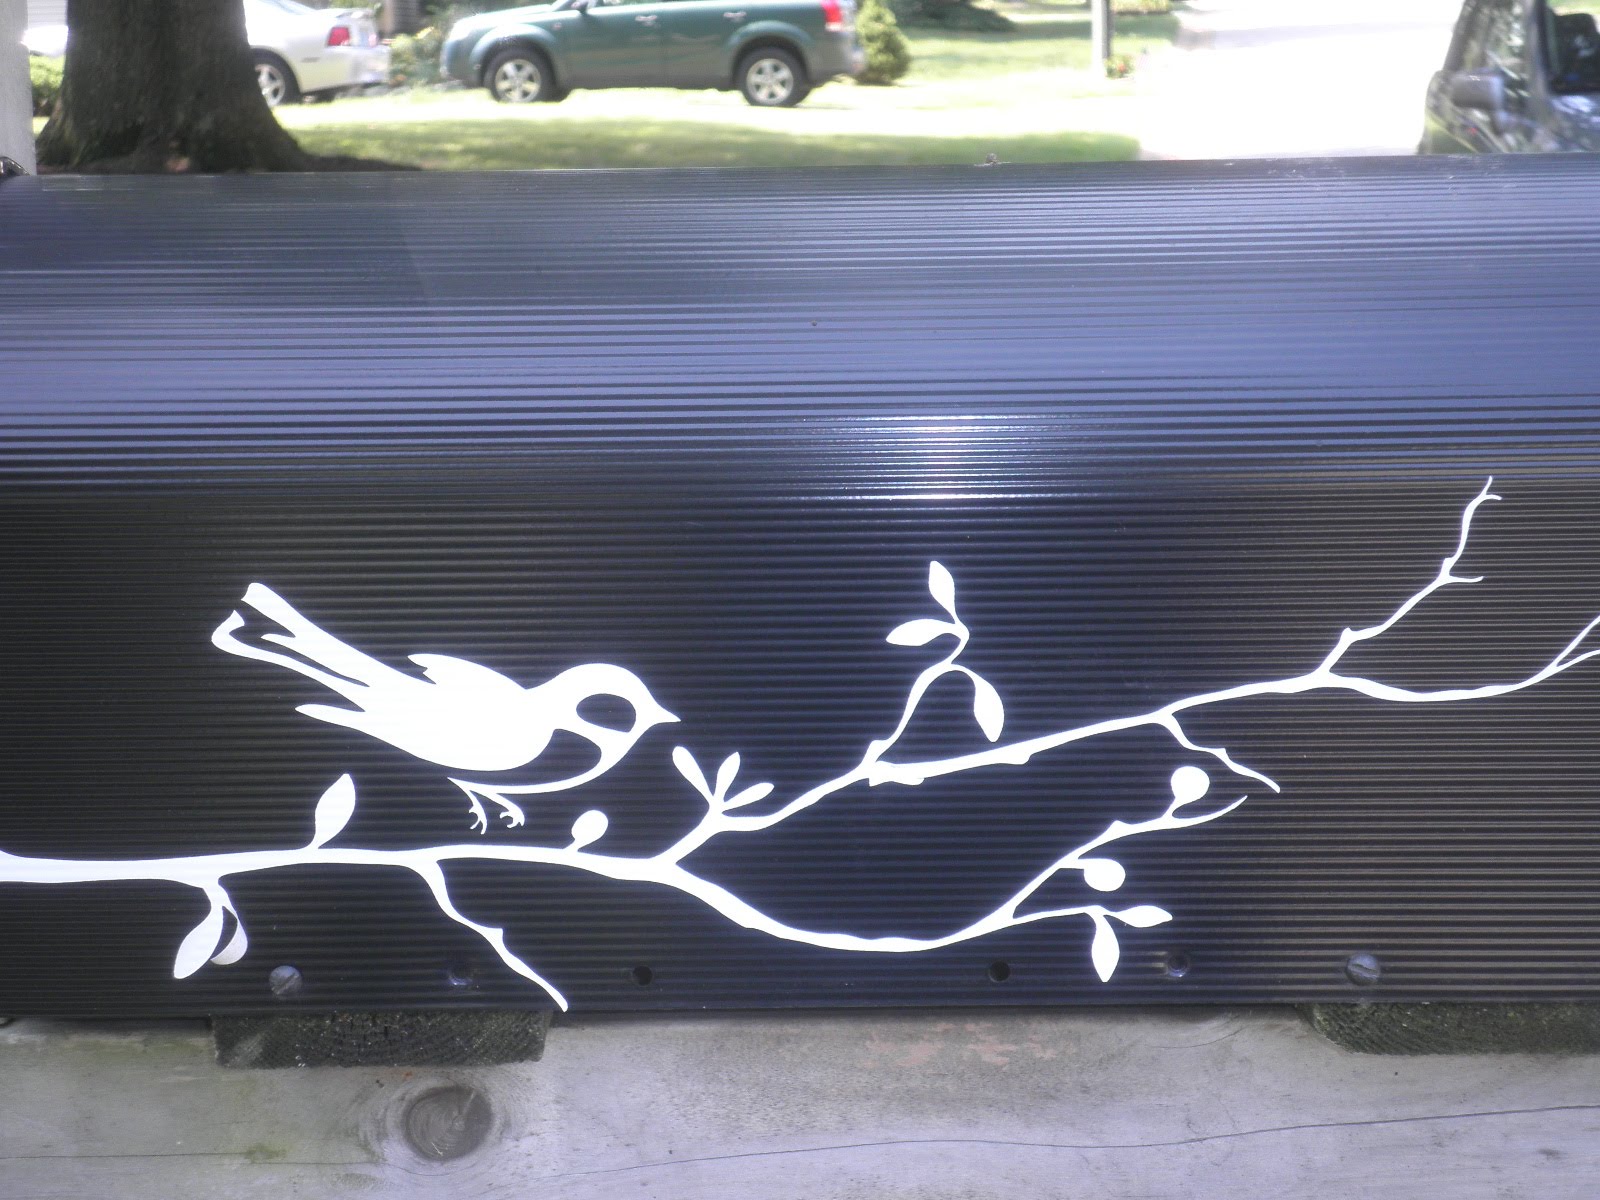
I love to decorate my mailbox and had this boring black up for a year or so and never having the time to paint it, so....one day I was cutting some vinyl with my Cricut and it occurred to me that I could use the vinyl  to decorate my mailbox, so I whipped out some white Wall Pops and got busy.
So this is what I came up with. I used the Cricut Cartridge Home Decor. It was so fast and easy, I can see changing it out with the season's. Ohhh a Christmas one will be so fun! One thing to remember when cutting your vinyl you need to use the flip feature on your Design Studio or your Gypsy for the other side so they will match.
Here it is up close and personal. If you try this I would love to see what you come up with. You could go crazy with this but for now I really like this simple design.

Sunday, January 24, 2010

My Favorite


This is a picture of my youngest son. We have a family joke between my oldest son and myself. He always accuses me of picking our younger son as my favorite and I always agree with him. I tell him why not he is sweet, he gives me lots of hugs and he tells me I am the best mom is the whole world. Why wouldn't he be my favorite. When I saw this picture that I took of him in the car on the way to central IL, we were sitting in the back seat together and he had just woke up. I think that some picture are just better in black and white. You don't get caught up in all the colors and the essence of the picture comes out.


The frame I created in Design Studio. Sometimes when you design thing the cut comes out way different than what you think. I didn't realize when I designed this that it would come out in two pieces (the inside frame is  seperate from the outside frame) I probably need to rework it but at the time I was in a the scrapping mode. I used the Opposite Attracts cartridge for the letters and just used a black pen to out line the letters. I used rub ons for his name on the picture itself. The paper is from Basic Grey's Urban Prairie collection. Look at the cute little bee in the corner :)

Monday, December 21, 2009

Handmade Christmas Gifts

OUR GRANDKIDS
I have never had an orignal  idea. I saw a picture frame like this one at Archivers, but always having my mothers mantra in the back of my mind ("There is always a cheaper way"). I found some 12x12 frames at Michael's they were $4.99 on sale and I had a 20% off coupon but I splurged on the paper, I felt this paper went so well with my sister-in-laws living room. The picture openings are  4x4. I made the pattern with my Cricut Design Studio. I made 4 frames in total and will share some more over the next few days.
              
This is a close-up of the the decorative 4x4 square. My brother-in-law and sister-in-law have 2 grandson's with another on the way this spring. They are so proud of them. I know they will enjoy placing their pictures in this frame for all to see.


Related Posts Plugin for WordPress, Blogger...